Jewel Orchids, known for their stunning foliage rather than flowers, are popular among plant enthusiasts. These tropical rainforest plants can be easily grown indoors with the proper care and conditions.
By understanding their specific requirements, you can enjoy the beauty of these unique orchids as houseplants.
Several key factors to consider when caring for Jewel Orchids include the appropriate potting mix, lighting conditions, and watering practices.
By mastering these essentials, you can ensure the health and growth of your Jewel Orchid (Ludisia discolor) and delight in its striking, jewel-toned leaves.
In this article, we'll cover
- 1. Identifying a Jewel Orchid
- 2. Selecting the Right Growing Environment
- 3. Planting and Potting Jewel Orchids
- 4. Watering and Fertilizing Jewel Orchids
- 5. Pruning and Repotting Jewel Orchids
- 6. Propagating Jewel Orchids
- 7. Jewel Orchid Care During Winter
- 8. Common Pests and Diseases that Affect Jewel Orchids
1. Identifying a Jewel Orchid
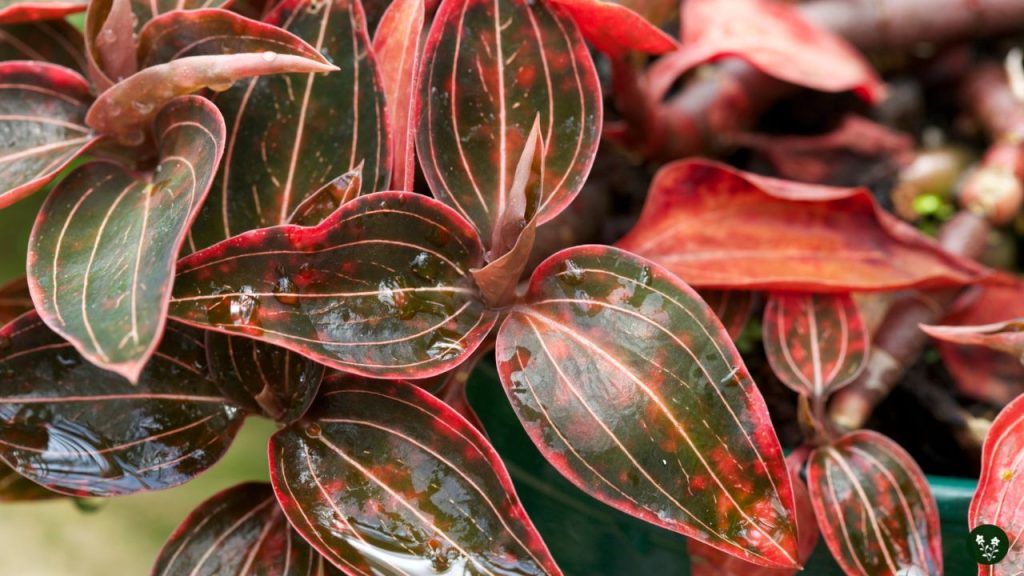
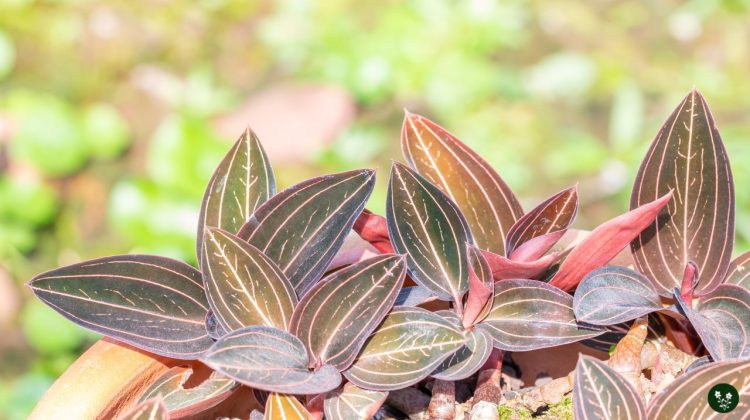
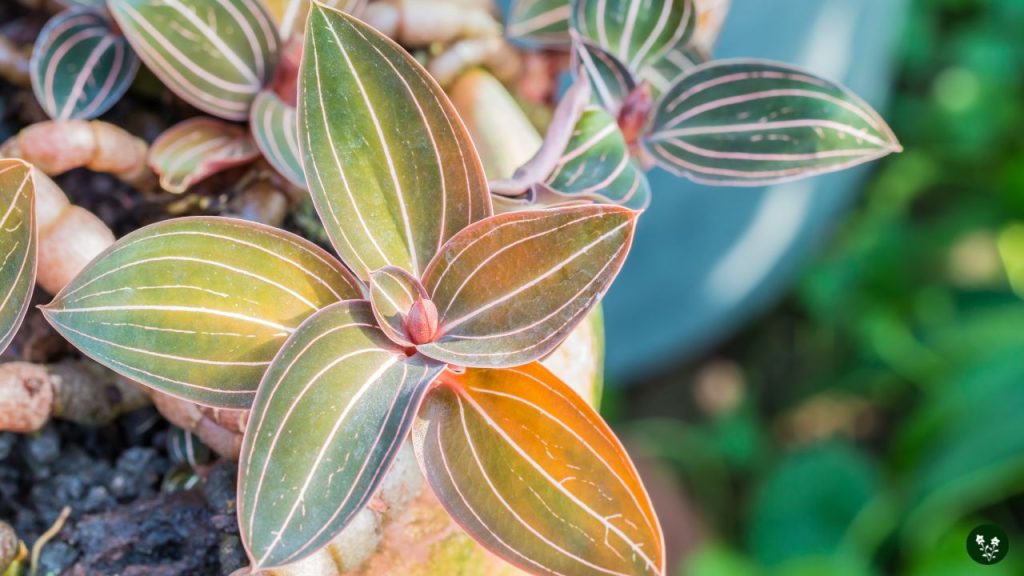
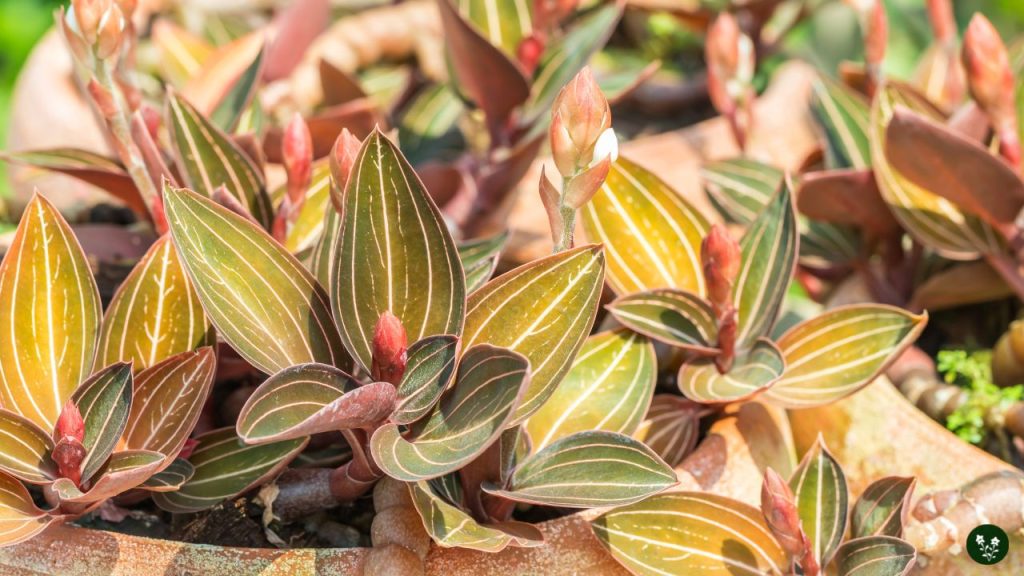
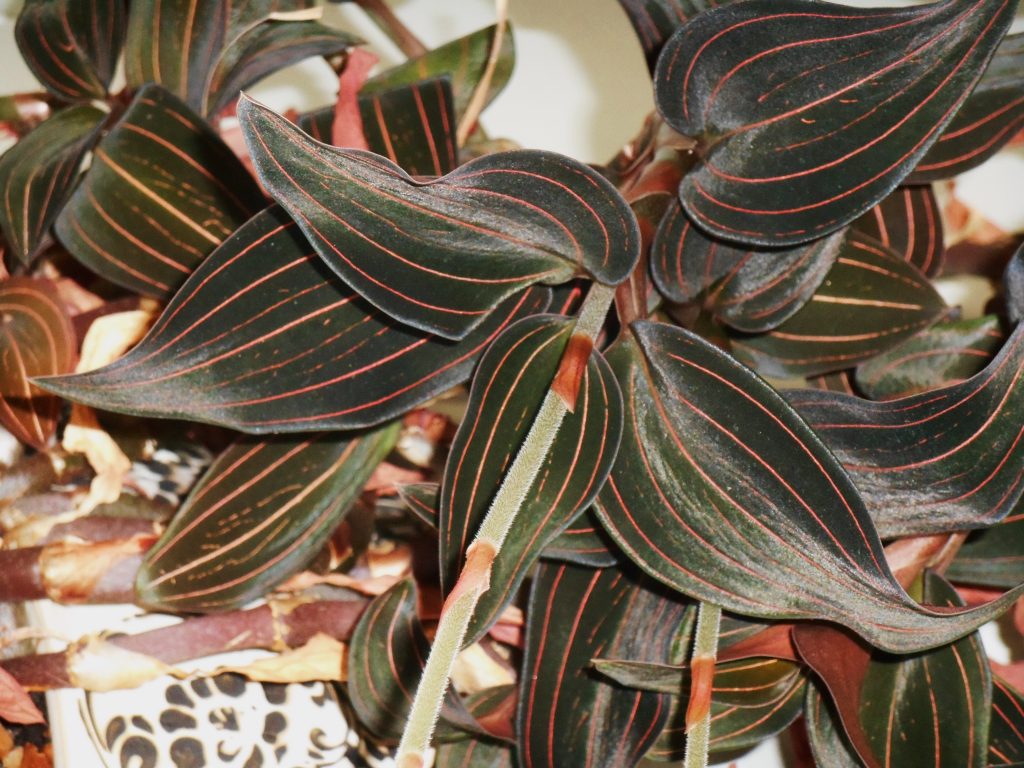
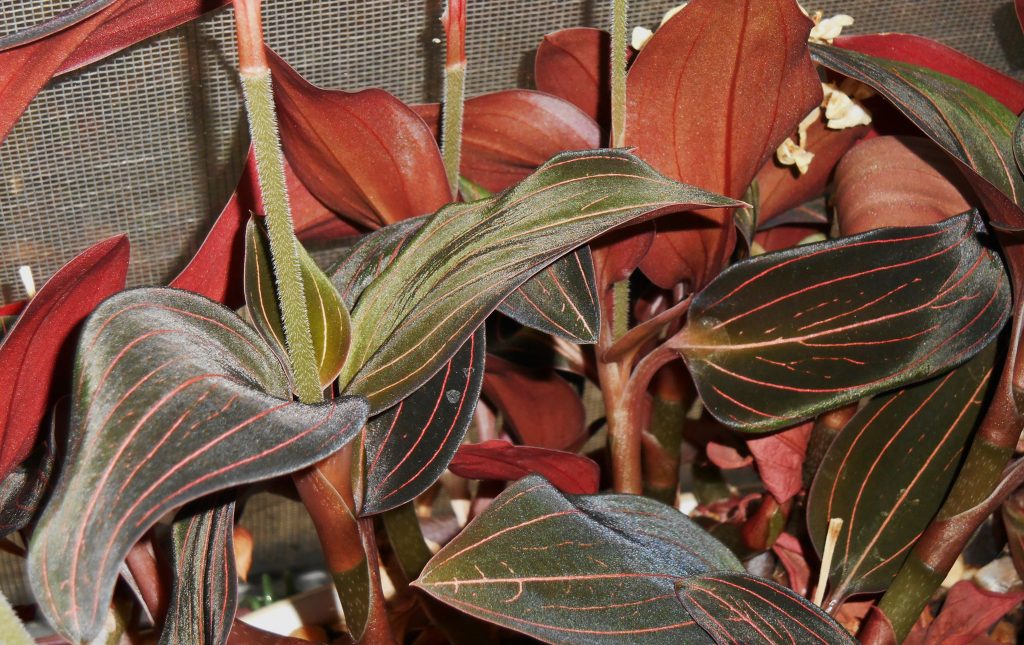
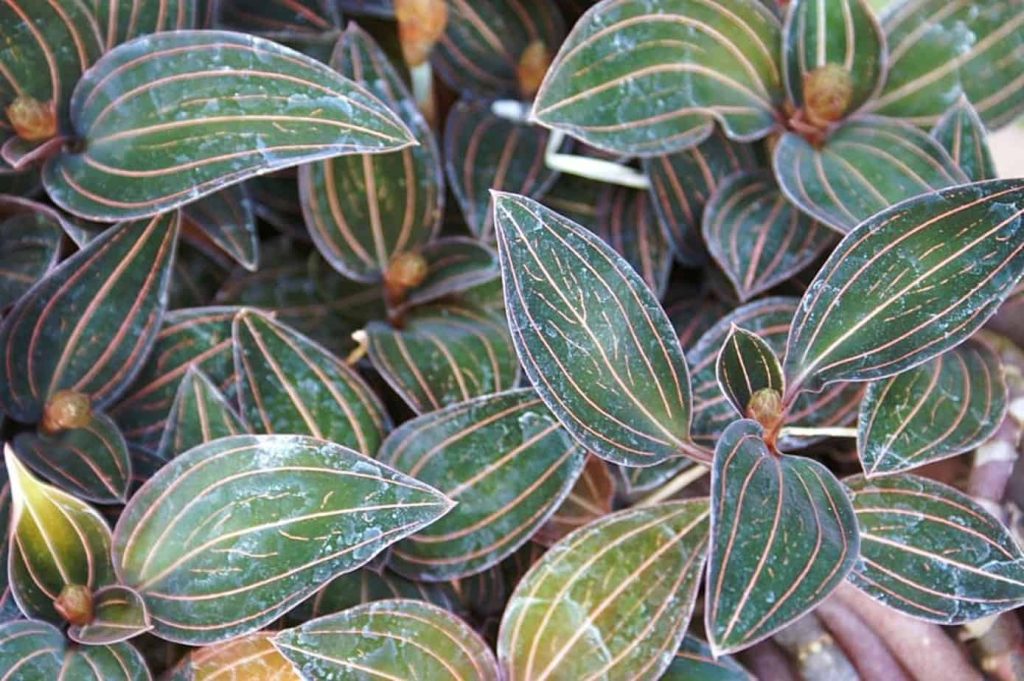
Jewel Orchids are known for their stunning foliage rather than their flowers. These plants display dark, velvety leaves with intricate patterns and veins, often in shades of green or gold.
Recognizing a Jewel Orchid primarily involves examining its leaves and growth habit.
Some common characteristics of Jewel Orchids include:
- Leaves: Dark, often near-black, with striking gold or silver patterning
- Veins: Prominent and intricately designed, adding to the plant’s overall appeal
- Flowers: Typically small and delicate, usually white, pink, or red, and may not be the main reason for growing the plant
- Growths: Jewel Orchids have a ground-based growth habit, unlike epiphytic species that grow on trees
Among the various types of Jewel Orchids, Ludisia discolors are the most common and well-known species. It features dark green leaves with reddish-brown undersides and prominent, pinkish-white veins.
Other species in the Jewel Orchid family, like Anoectochilus or Macodes, may exhibit different leaf colors and patterns. Still, they all share the distinctive foliage that sets them apart from other orchids.
When caring for Jewel Orchids, it is important to understand their unique growing requirements to maintain the vibrant foliage that makes these plants so desirable.
Providing the proper temperature, humidity, and light conditions and using the appropriate potting medium will help ensure a healthy and attractive Jewel Orchid.
2. Selecting the Right Growing Environment
Choosing the right environment is crucial for the healthy growth of your Jewel Orchid.
Light Requirements
Jewel Orchids thrive in low light conditions, making them suitable for indoor growing. It’s best to position your plant in a location that receives filtered or diffused light, avoiding direct sunlight, which can harm the foliage.
Placing the plant near a north or east-facing window or using a sheer curtain to filter the light is recommended.
Temperature
These orchids prefer a consistent temperature range of 60-80°F (15-27°C), with night temperatures around 60-65°F (15-18°C) and day temperatures between 70-80°F (21-27°C).
Maintain consistent temperatures, and avoid drafts and sudden temperature changes to ensure your Jewel Orchid’s successful growth.
Humidity
Jewel Orchids enjoy a humid environment. Aim to maintain a 40-60% humidity level for optimal growth. To achieve this, you can:
- Use a humidifier to increase moisture in the air.
- Place your plant on a tray filled with pebbles and water, ensuring the bottom of the pot is not touching the water to avoid root rot.
- Regularly mist the plant, being cautious not to oversaturate the leaves.
Your Jewel Orchid will flourish and showcase its stunning foliage by selecting the right growing environment with the proper light, temperature, and humidity conditions.
3. Planting and Potting Jewel Orchids
Potting Mix
Jewel Orchids require a different potting mix compared to other orchids. They need a potting medium with good aeration and moisture retention.
A suitable mix can be created from peat moss and perlite. You can also add leaf compost or long-fiber sphagnum moss for better results.
Choosing the Right Container
Selecting a pot that provides adequate drainage and aeration for your Jewel Orchid is crucial. These plants tend to spread out, requiring a wide, shallow growing pot.
Ensure the container has holes or a built-in drainage system to prevent waterlogging and root rot.
When potting or repotting, using a container that allows the plant to grow and spread, supporting its unique growth habit is essential.
4. Watering and Fertilizing Jewel Orchids

Jewel Orchids require proper watering and fertilizing methods to thrive.
Watering Techniques
There are two main methods for watering Jewel Orchids:
- Top Watering: This technique involves pouring water directly onto the soil surface. Avoid over-watering and only water the plant when the soil is slightly dry to the touch.
- Bottom Watering: For this method, place the pot in a tray filled with water, allowing the plant to absorb water from the bottom. This technique helps maintain proper moisture levels and reduces the risk of root rot.
It’s important to water Jewel Orchids twice weekly, as Picture This suggested, ensuring the plant stays consistently moist but not overly wet.
Fertilizer Types and Frequency
Jewel Orchids can benefit from regular fertilization during the growing season. They do not have high nutrient demands so that a balanced orchid fertilizer can provide adequate nutrition for your plant.
When choosing a suitable fertilizer, consider one specially formulated for orchids with a balanced N-P-K ratio (Nitrogen, Phosphorus, and Potassium). The Orchid Resource Center suggests using a reliable orchid fertilizer to nourish your Jewel Orchid.
As for the frequency, Jewel Orchids don’t require heavy fertilization. Fertilizing 2-3 times a year during the growing season is enough.
Over-fertilizing can lead to root burn, so follow the fertilizer’s instructions carefully.
5. Pruning and Repotting Jewel Orchids
When to Prune
Jewel Orchids require minimal pruning, but removing yellow or dying leaves is essential to maintain the plant’s health and appearance.
Pruning can help encourage better-growing conditions, stimulating new growth and eliminating potential disease sources. Always use clean scissors or shears to reduce the chance of infection or damage when pruning your Jewel Orchid.
The ideal time to prune your Jewel Orchid is after it has finished flowering or when you notice unhealthy leaves or growth.
Regularly inspect the plant for any signs of decay or disease and act accordingly to maintain a healthy and attractive Jewel Orchid.
Repotting Procedure
Repotting your Jewel Orchid may be necessary when the pot becomes overcrowded or the plant becomes unstable and top-heavy. To report a Jewel Orchid, follow these steps:
- Select a container with a drainage hole that is one to two inches wider in diameter than the previous pot. This will allow space for new growth and improved airflow.
- Prepare a suitable potting mix tailored to the needs of Jewel Orchids, such as a well-draining mixture that retains moisture but doesn’t become soggy.
- Carefully remove the Jewel Orchid from the existing container, ensuring minimal damage to the roots.
- Inspect the root system for any signs of rot or disease and trim away any affected roots with sterilized scissors or shears.
- Place the orchid in the new pot, ensuring that the base of the plant is positioned slightly above the soil line to prevent rot.
- Fill the remaining space with the potting mix, ensuring the roots are covered, and the plant is stable. Firm the soil gently with your fingers to help the Jewel Orchid establish its new environment.
- Water the newly repotted Jewel Orchid lightly to help settle the soil mix and encourage new root growth.
By following these steps, your Jewel Orchid will have the opportunity to grow and thrive in its new pot, ensuring a healthy and stunning display for years to come.
6. Propagating Jewel Orchids
Propagating jewel orchids can be done through various methods, such as division and leaf cuttings. Both methods are relatively easy to perform and can help you grow new plants from your existing jewel orchids.
Division
Propagating jewel orchids via division involves removing a root section from the parent plant and planting it separately.
This method is suitable for well-established plants with multiple growths. To perform this method, follow these steps:
- Carefully remove the jewel orchid from its pot, not damaging the roots.
- Identify a healthy section of the plant with at least one new growth and a good root structure.
- Separate the chosen section from the parent plant using a clean, sharp tool, including some roots.
- Plant the separated section in a new pot filled with moist sphagnum moss or a suitable potting mix, ensuring the roots are well-covered.
- Monitor the newly potted section for any signs of stress, and provide the same care as the parent plant regarding temperature, humidity, and light.
Leaf Cuttings
Another propagation method for jewel orchids is by taking leaf cuttings. This involves taking a healthy plant stem, approximately 10cm long, and planting it directly into moist sphagnum moss or potting mix.
The engraftment of young shoots is faster and easier during the spring and summer months. Follow these steps for successful leaf-cutting propagation:
- Select a healthy stem with at least 2-3 nodes intact, and make a clean cut using a sharp tool.
- If desired, sear the cut with brilliant green or coal to prevent infection.
- Plant the cut stem immediately into moist sphagnum moss or a suitable potting mix, ensuring the nodes are well-covered to promote root growth.
- Provide the same care as the parent plant regarding temperature, humidity, and light while keeping a close eye on the cutting for any signs of stress or growth.
7. Jewel Orchid Care During Winter

In the winter months, it’s important to keep your Jewel Orchid away from heat sources. Position the plant at least 4 feet (1.2m) away from any heating system within your home.
While your orchid is not actively growing during this season, it still requires care and attention to ensure it thrives.
It is also essential to provide your Jewel Orchid with a comfortable temperature.
Be mindful of cooler nighttime temperatures and protect the plant from cold drafts by keeping it away from windows and doors and heat or AC vents (Guide to Houseplants).
Even during winter, ensure your orchid is placed in a room with access to bright but indirect sunlight. Direct sunlight for extended periods can harm the plant.
Since the plant is not actively growing in winter, avoid fertilizing it during this time.
Instead, focus on providing the appropriate temperature, light, and humidity conditions for your Jewel Orchid to survive until the next growing season.
8. Common Pests and Diseases that Affect Jewel Orchids
Jewel Orchids can be affected by a few common pests and diseases, although they are generally not particularly susceptible when given proper care.
Some of the most common pests found on Jewel Orchids are spider mites, fungus gnats, mealybugs, and thrips.
Mealybugs can be easily recognized by their white, cotton-like clumps on the stem and are small insects that feed on plant sap.
Regularly inspect your plant for any signs of pests and, if needed, treat it with insecticidal soap or other appropriate control methods.
Besides pests, Jewel Orchids can also suffer from diseases, with the most common one being root rot. This is caused by overwatering or keeping the plant in a cool, damp environment.
To prevent root rot, provide the correct amount of water, avoid overwatering, and ensure that the plant is in a well-ventilated area with proper drainage.
By regularly inspecting your Jewel Orchid for any signs of pests or diseases and taking appropriate preventive and treatment measures, you can enjoy a healthy and beautiful plant throughout its lifetime.
Leave a Reply